Introduction to Resin Casting
Having read many articles about casting resins like Alumilite and watched numerous YouTube videos I was still surprised by my first casting. The first item I thought I would encase was a pine cone! It had no moisture content and appeared fully expanded or open, however as the heat generated by the epoxy reaction increased, the cone scales started to further pop, introducing voids. In my efforts to control the mould contents, the Pot Life time approached, indicated by significant stiffening of the resin mix, meaning the resin was unable to flow and fill the new voids, even under pressure. Valuable lessons were learnt from this experience which I aim to pass on in this article.
Preparation is Key
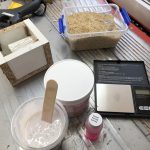
Organise your workspace before you start to mix. Make sure all the equipment you need is laid out and readily accessible. This should include:
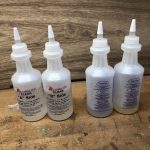
- The resin of your choice. Typically both parts A&B have been opened, foil seals removed and pouring spouts clipped open.
- Dyes of your choice.
- Mica powders available in a rainbow of colours.
- Mixing cups – smooth sided clear drinking plastic cups are ideal. Large and small are used depending upon the project. They are used once only and then binned.
- Wooden tongue depressors make great stirrers available cheaply on eBay. They are stiff enough to not snap or flex when mixing.
- Latex/Nitrile style gloves to protect your hands
- Pressure Pot, connected compressor and mould carrier
- Moulds to suit the project
- Scales – ideally with a range covering fractional grams and a tare reset function.
- Graduated container (and dry rice!)
Resin Types
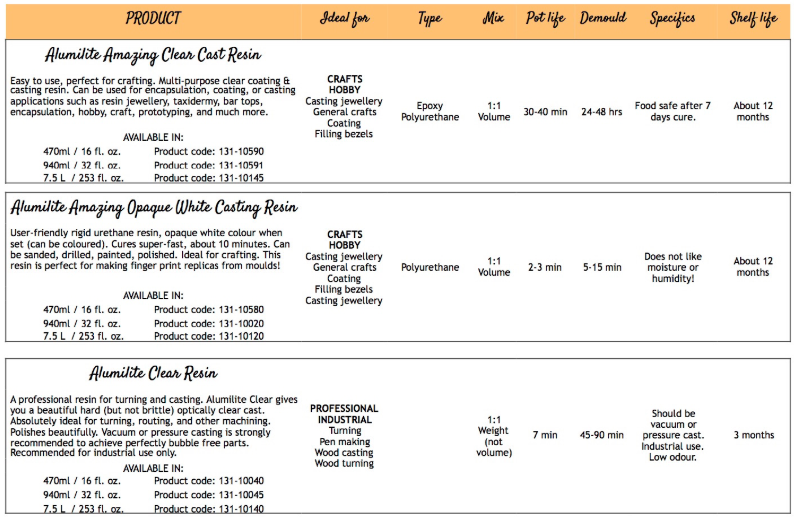
The terminology around epoxy resins is a little confusing. The epoxies fall into two main types Polyester and Polyurethane. For turning purposes, polyurethane epoxies are generally the preferred option. They are considered to turn better with less chip out forming streamers of waste. Some 3D artists seem to prefer polyester types for straight casting often including fillers and pigments. It should be noted the pigments are not interchangeable. By far the most well-known brand of a polyurethane resin is Alumilite, who also supply a matching range of pigments. In the UK the most cost-effective and comprehensive supplier is Metal-Clay. In addition to pigments, Mica particles can also be used to add some amazing effects to the finished resin. Alumilite produces a range of resins some clear, some white, the clear variety are most favoured. Within that, there are two main types, similarly named so be careful what you order!
How much resin?
So your mould is an awkward shape or is made up of compartments making it difficult to calculate the volume mathematically. What do you do? The simplest way I have found is to use dry rice grains! Fill your mould to the required level with dry rice, then decant into a measuring beaker. This will give you a fairly accurate idea of how much resin you need to mix. This is easy with ‘mix by volume’ resins, you just split the required volume in two, in proportion to the manufacturers recommended mixing ratio. Those resins that you mix by weight, will have a conversion specified on the packaging indicating a weight to volume formula. This will require a little more math to arrive at your required parts A&B weights.
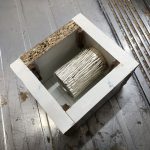
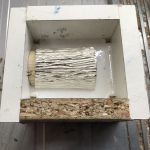
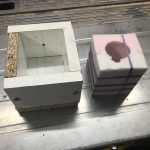
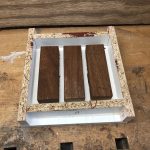
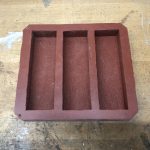
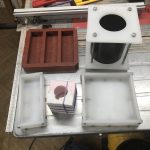
Moulds – containing the resin
Moulds for resin casting generally come in two main groups of materials. Silicone rubber and plastic (HDPE, etc). The silicone type and their manufacture details can be found in this article: Moulding the mould… The plastic variety can be formed from a range of commonly available plastics. Nylon chopping boards from the supermarket are cheap and readily cut to shape. This can be combined with plumbing and electrical pipes to yield a range of moulds for different purposes. Sometimes, a mould release spray isn’t even needed, before adding the resin. A sharp tap on the cured resin can be enough to extract the casting.
Mixing and Styling
Time is your enemy! As you can see from the Pot Life column in the table above, you don’t have long once parts A & B are combined. Some casters add their dyes and mica colourings to part A and then mix, but this can make it difficult to see the strands of unmixed parts of A & B, so some prefer to mix A & B, then add their colourings. Either way, with Alumilite Clear you have only 7 minutes! Don’t panic though, with good organisation and everything laid out on your workbench, 7 minutes is plenty long enough. Stepping back, once you have chosen your resin, read the instructions and check how the proportions are calculated. Alumilite is 50:50, but note that one type this is by weight and the other volume! Other manufacturers products can have entirely different ratios, so read the instructions carefully! Next, when you have combined the parts A & B, they need to be mixed thoroughly, so you have a uniform colour to the combined mixture with no streaks or strands running through the mixture. The mixing should include the corners and scraped sides of the beakers so there are no unmixed resin constituents. The mixing should be firm, but not so vigorous as to incorporate excessive air.
Separate your mixture into separate beakers if you are doing a multi-colour pour. Add dye and/or mica powder to the beakers, and again mix in thoroughly. You can let your creativity run wild here. Dyes and mica’s can be mixed together in any combination. You can also add other effects like iridescent, phosphorescent and pearlescent powders for that unique look.
As stated previously, heat is generated by this chemical reaction. Using an infrared thermometer, monitor the temperature. Most casters find when 30 degrees centigrade is reached, this is the optimum time to combine the different coloured mixes in your mould, so they combine, but retain their individuality and don’t just turn into one homogeneous colour!
Pressure Pot or not?
Although only Alumilite Clear needs pressure when curing, as I now have a pressure pot, I tend to put everything in it. The idea is that the 50 lb psi pressure crushes any air bubble to be so small they are invisible in the set resin. With Alumilite Clear curing so much faster than Alumilite Amazing Clear, there isn’t time to wait for air bubbles to rise to the surface and be pricked or even burst with a naked flame! Typically I leave my curing resin in the pot overnight. Usually, I see minimal pressure drop overnight with my setup, 10lb drop max, with which I can live.
Purpose made pressure pots can be expensive, but eBay can provide a source of pressure paint pots which can be easily converted and have a suitable safe working pressure. It just requires removal of the internal paint suction spout, capping this off externally. Then add two isolation valves and tail for attaching a pressure feed from your compressor to the existing tee. All joints should be well sealed with PTFE tape (6 turns) or paste/liquid. With the attached gauge and built-in pressure relief valve I have set mine to allow 50lb psi max pressure.
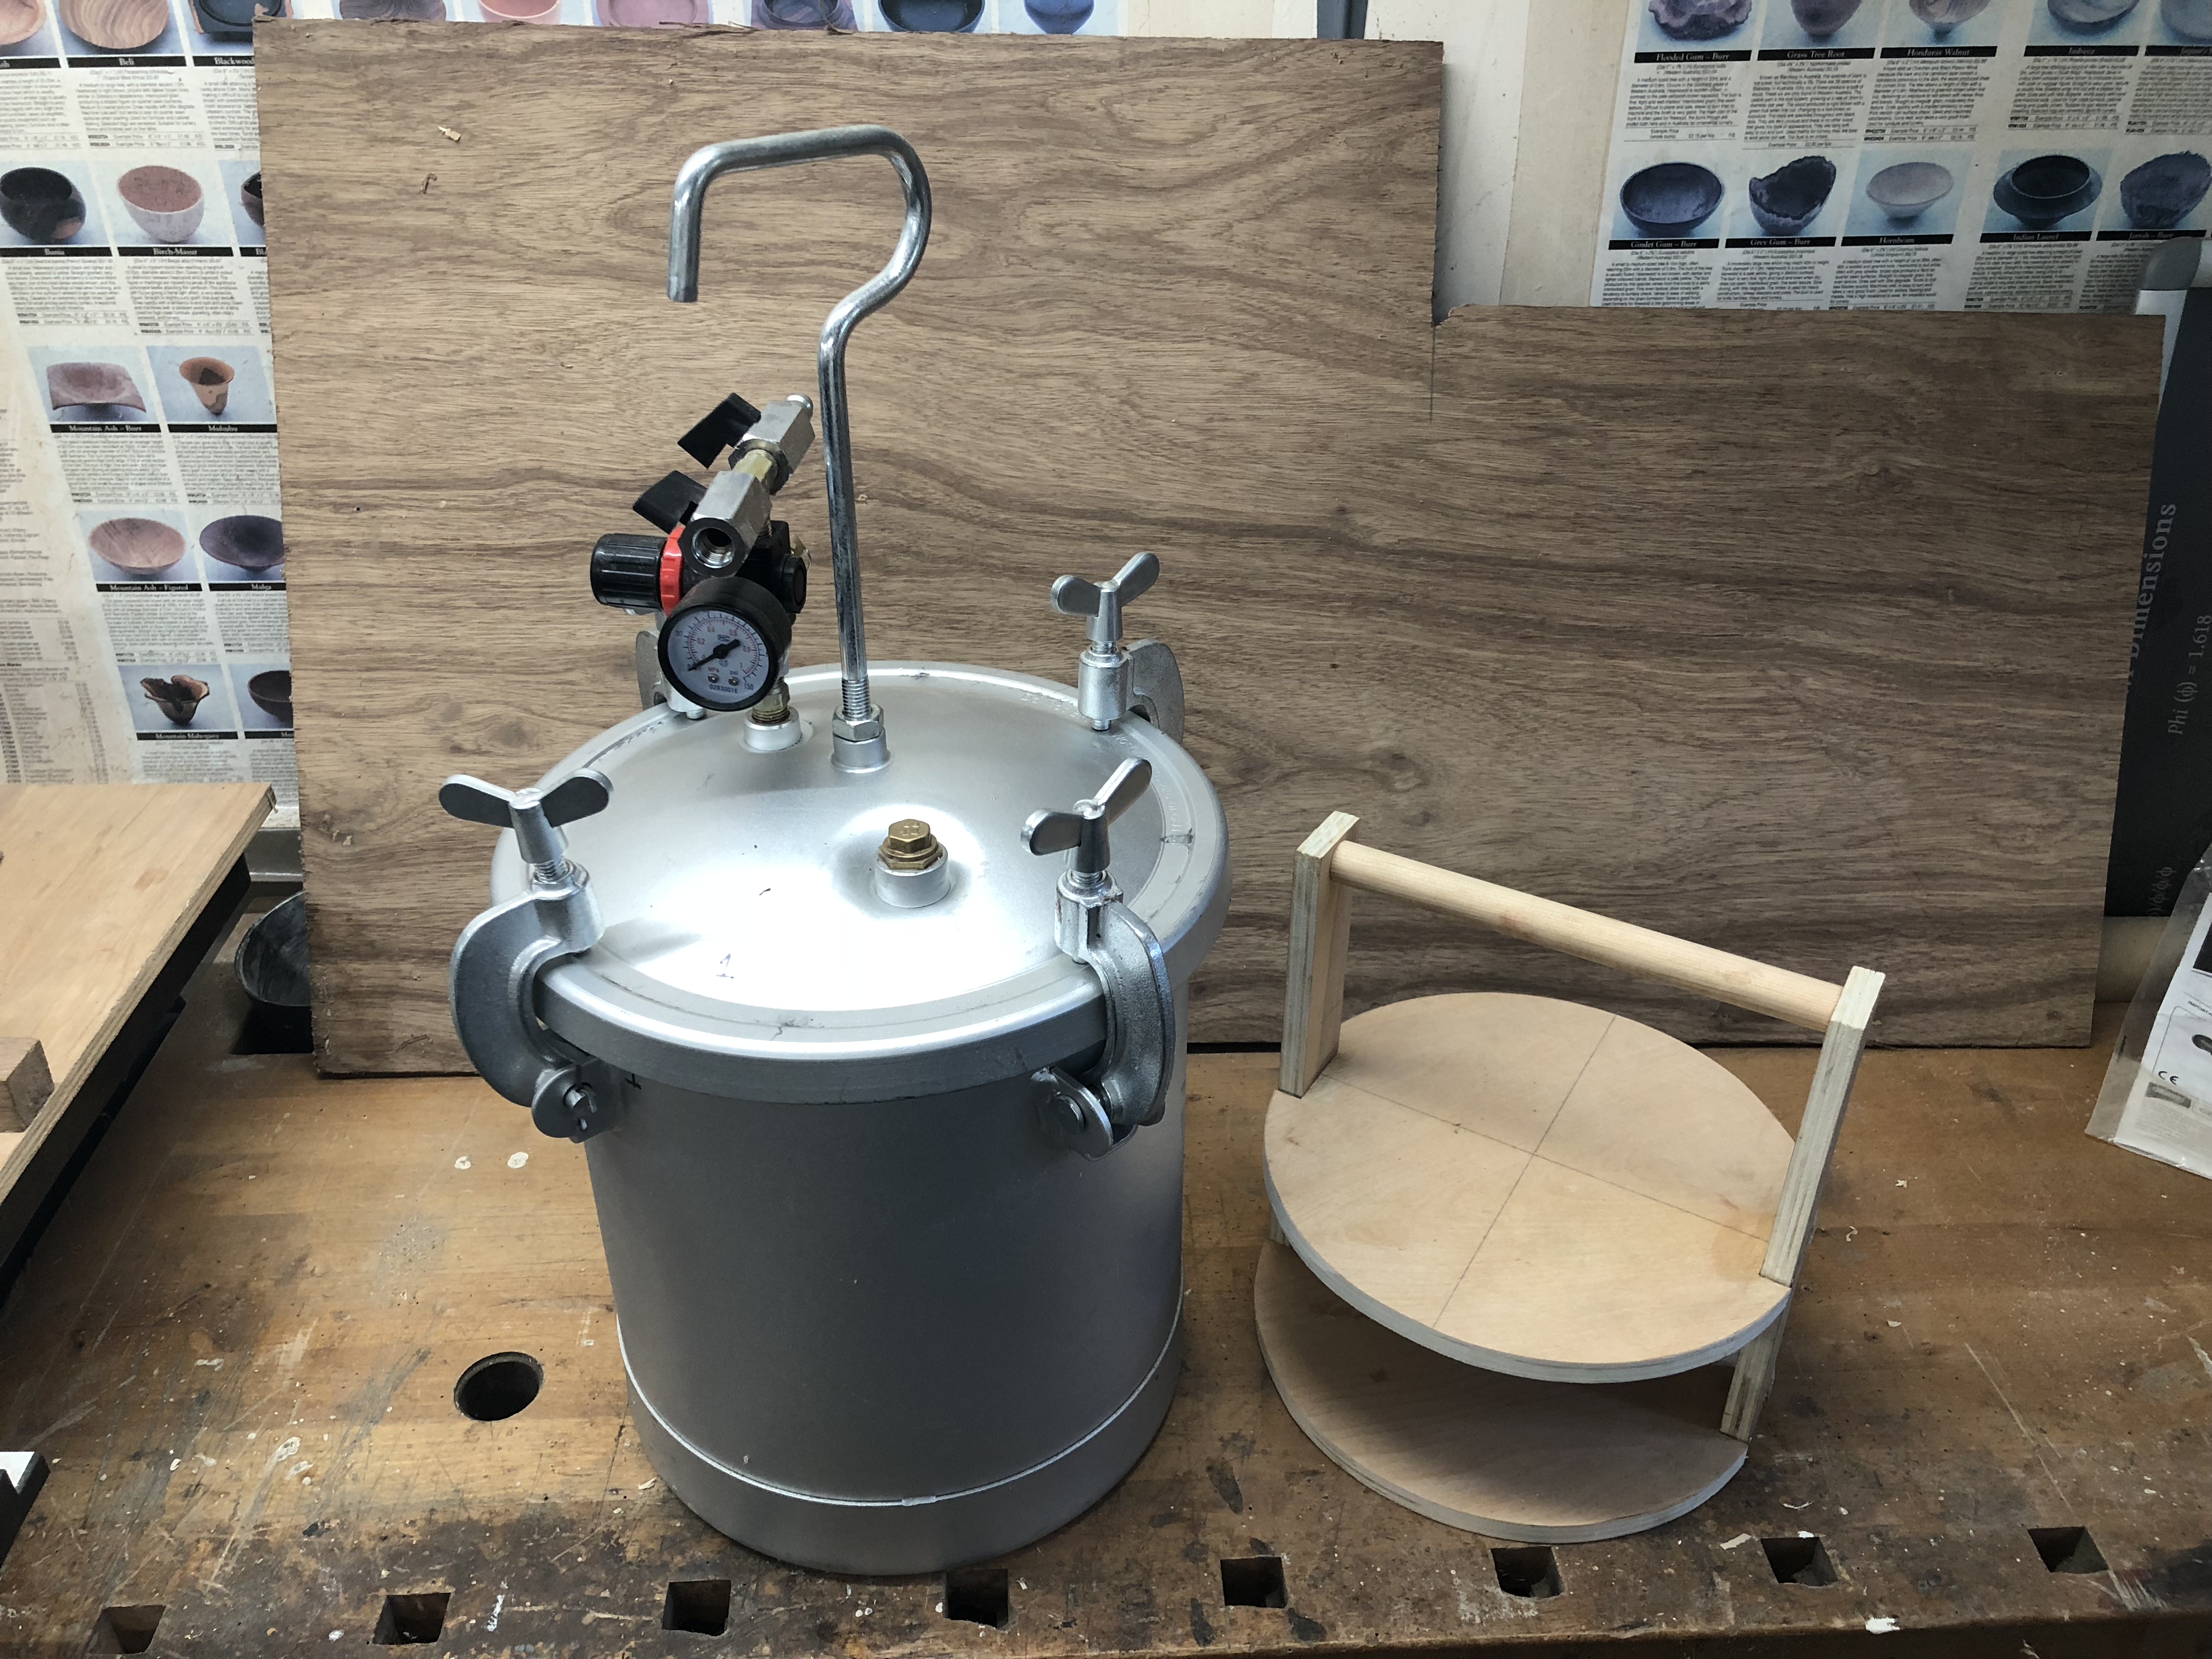
The internal base of the pot is dished, so making a simple wooden carrier makes life simpler lowering and retrieving moulds. If interest is shown in my setup, I’ll write up a more in-depth article and sources of components in a future article.
De-Moulding
After approximately 12 hours your resin will be easily hard enough to de-mould, but you should wait longer before turning it, perhaps 48hrs. Some silicone moulds give up their cast blanks easily, some plastic moulds need a sharp rap and the resin pops out, some can be a complete pain! The screwed together HDPE types seem to need a side or two removed, so the blank can be levered out. The pipe moulds sometimes release easily, sometimes I have to slit them up the tube side! Use of a commercial mould release definitely helps but isn’t a guarantee in my experience.
Conclusion
However careful you are mixing your resin volumes, you will likely be left with some dregs in your beaker. Keep a separate dregs beaker and tip your waste from each pour in it. Over time you will build a solid striped pot of resin you can use to turn a colourful, if random, bottle stopper!