Posted on Leave a comment

Turning Green Wood (Part 1)

image_pdfimage_print

Turning Green Wood – an introduction

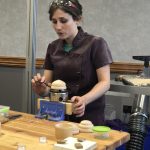
So, you’ve been turning seasoned blanks sourced from various suppliers, but you fancy something a bit more challenging. How about turning green wood, that is wood that has recently been felled and hasn’t been air or kiln dried? This opens up the opportunity to turn local wood species, unusual pieces like burrs/burls, and probably save money too! If you hear a chainsaw locally, go and ask the owner if you can have a look. It could be a homeowner who may be happy to donate some wood to you or it could be an arborist who is chipping everything anyway. They’re usually open to some bartering or even a freebie! Less for them to cart away.

Getting Started

I won’t be covering all the weird and wonderful techniques turners around the world have dreamed up to turn a lump of wood into something they can produce a blank. Let’s just consider the basics of the initial turning. At all stages dealing with green wood, think safety. I do not wish to be alarmist, just sensible. The fresh cut wood may have stresses and strains in it from felling, unseen cracks, loose bark and even excessive sap, all of which can produce flying missiles and hurt you. Protective outerwear and a stout face-mask are initial essentials (PPE).

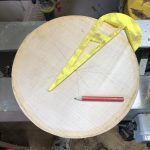
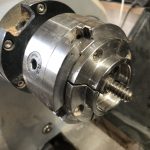
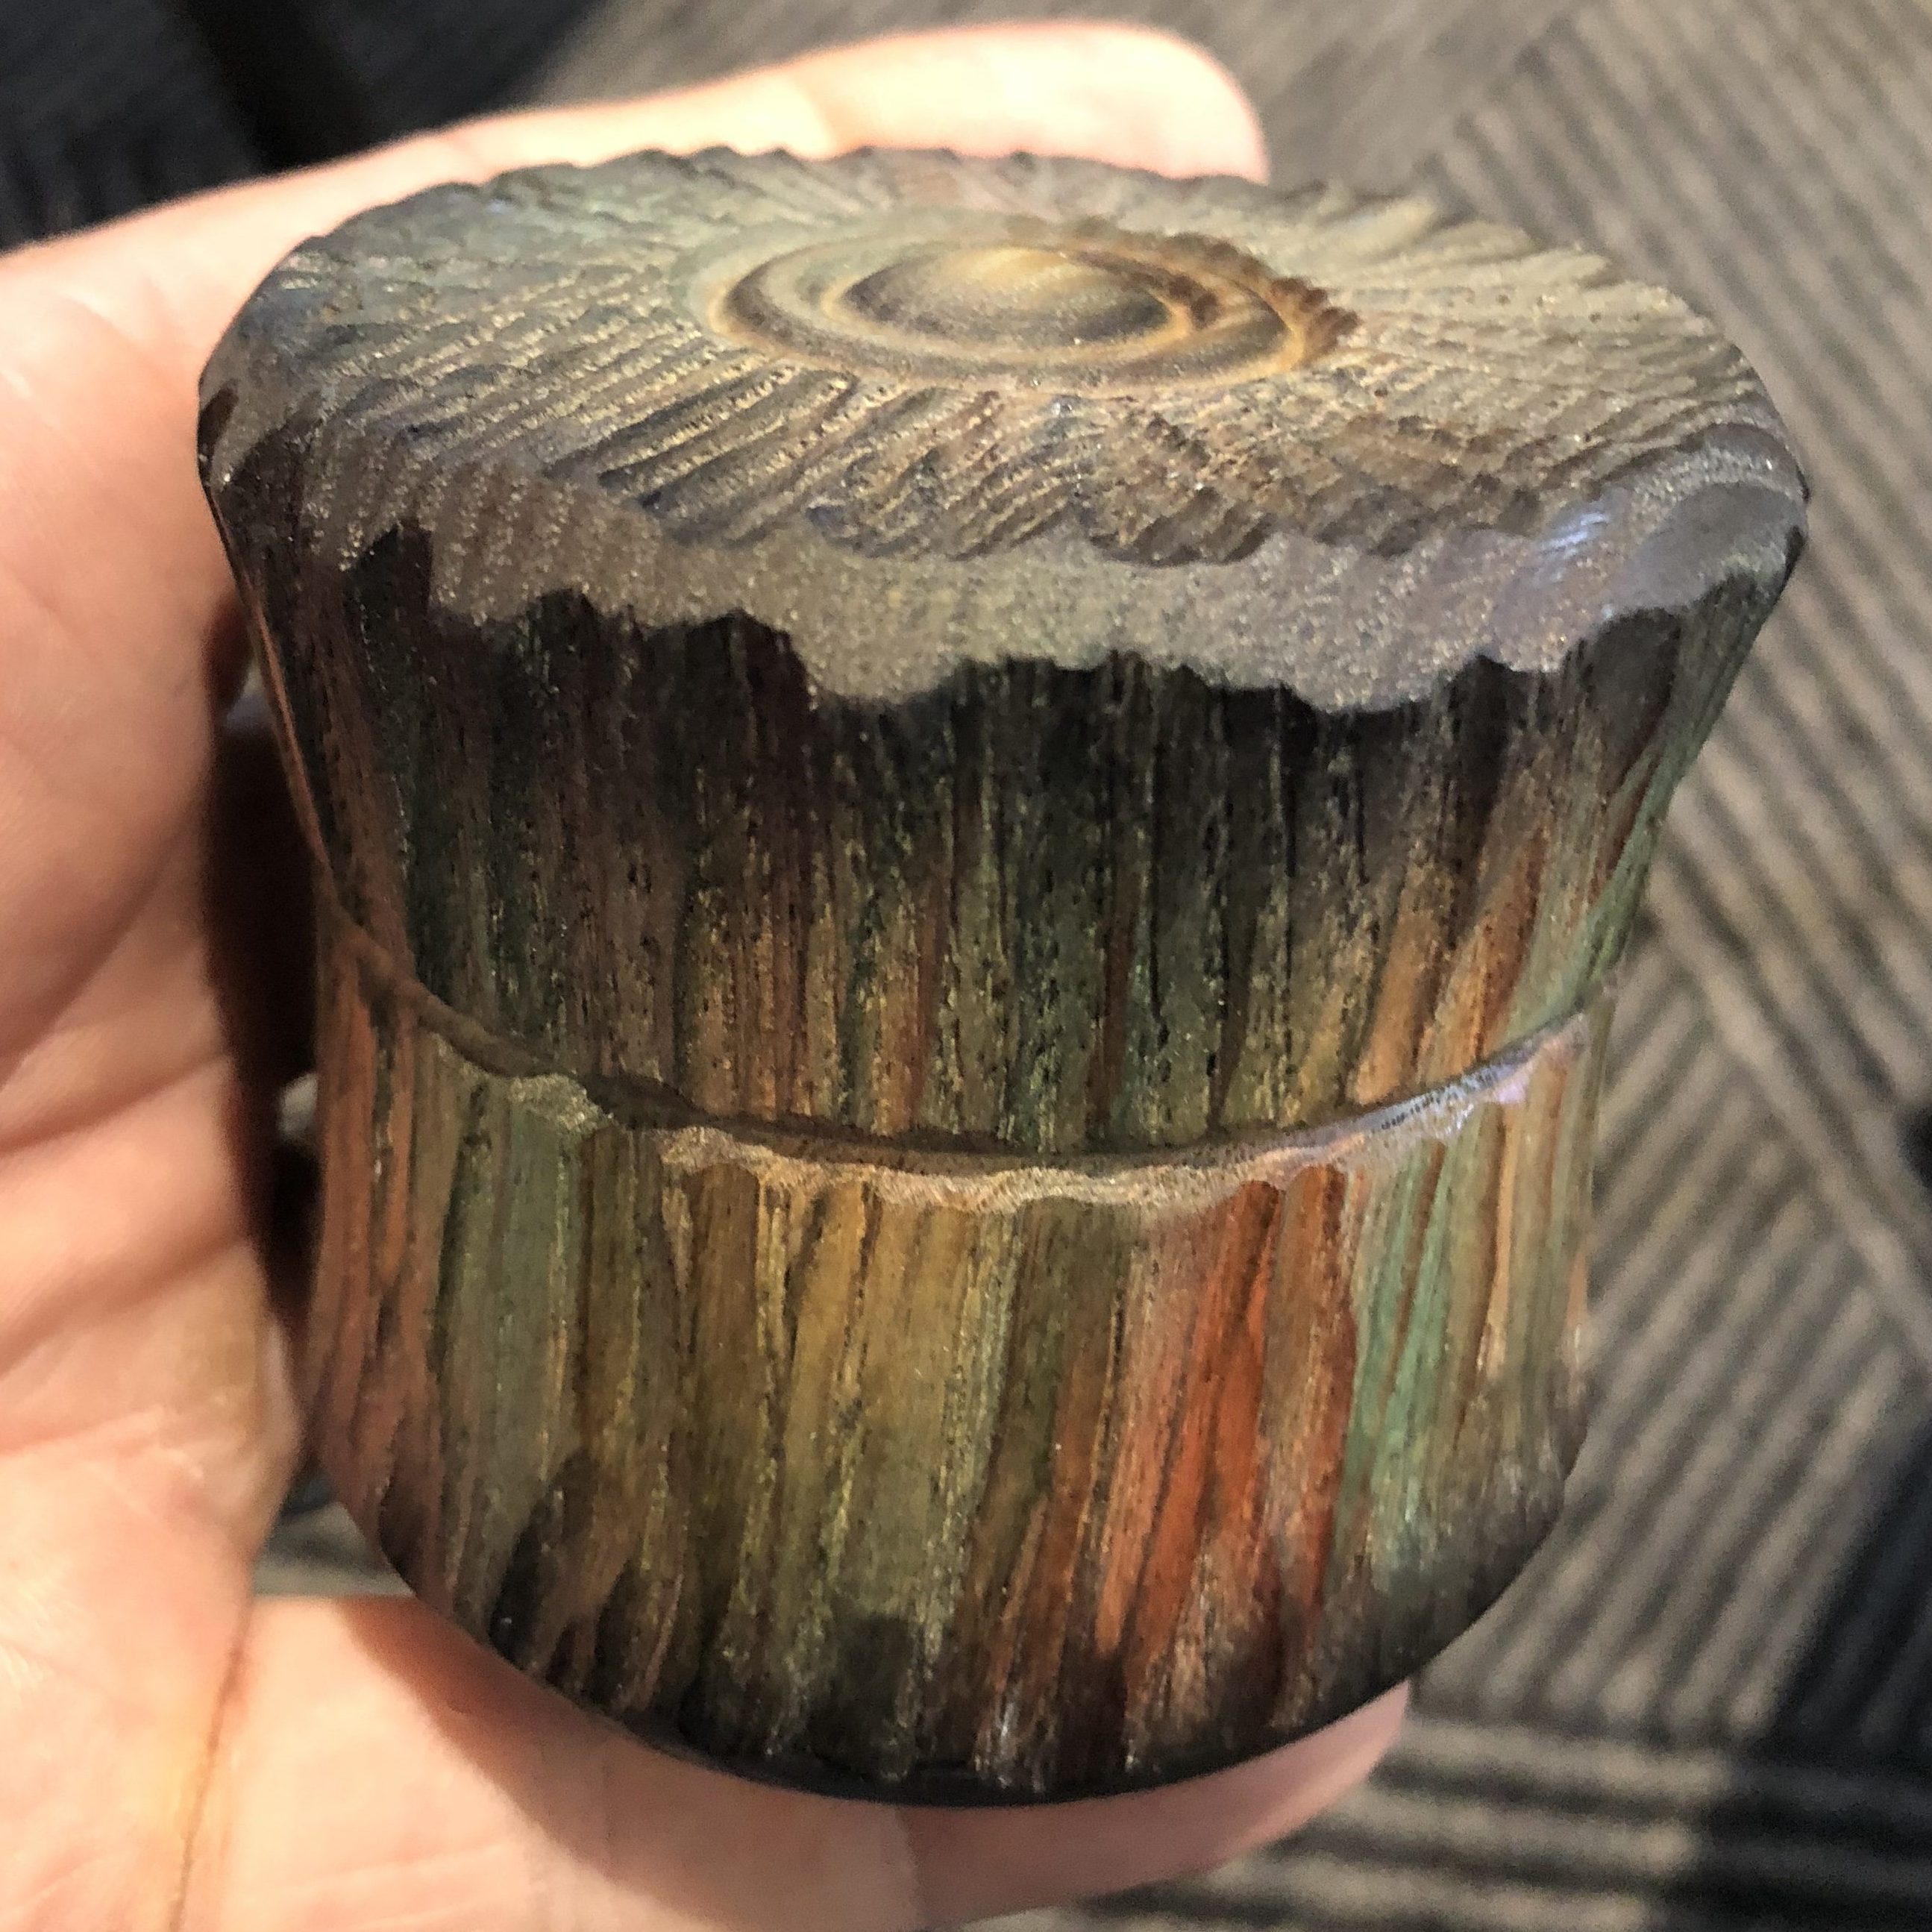
The best starter technique is to turn your piece between centres driven by a spur drive and supported by a live centre. It is important you have good visible centre mounting points as we’ll be using these in part 2 for remounting the piece once initial drying has completed. The piece should have first been made roughly round by chainsaw or band-saw before mounting, again taking care and using PPE.

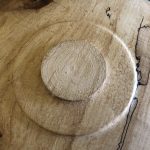
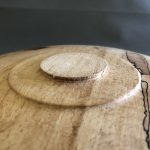
Initial turning should be at low speeds whilst knocking the edges off, just fast enough to have acceptable vibration in the lathe. This can be increased as the piece becomes more stable. Once round a chucking tenon should be formed at the headstock end. If you’re working on a large enough blank, turn a 4″ (100mm) approx tenon at this stage. We’ll use this tenon for rough shaping of the vessel and hollowing. Later, after drying the tenon may distort or even become oval. As we have made this tenon larger and retained the centre mounting point, the blank can be remounted between centres using a ball or large cone centre at the tail-stock end, and the tenon reduced to around 2″ (50mm) for the next size down set of chuck jaws.

Rough Turning

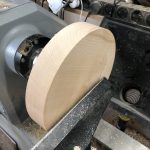
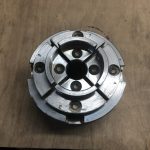
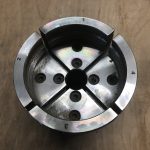
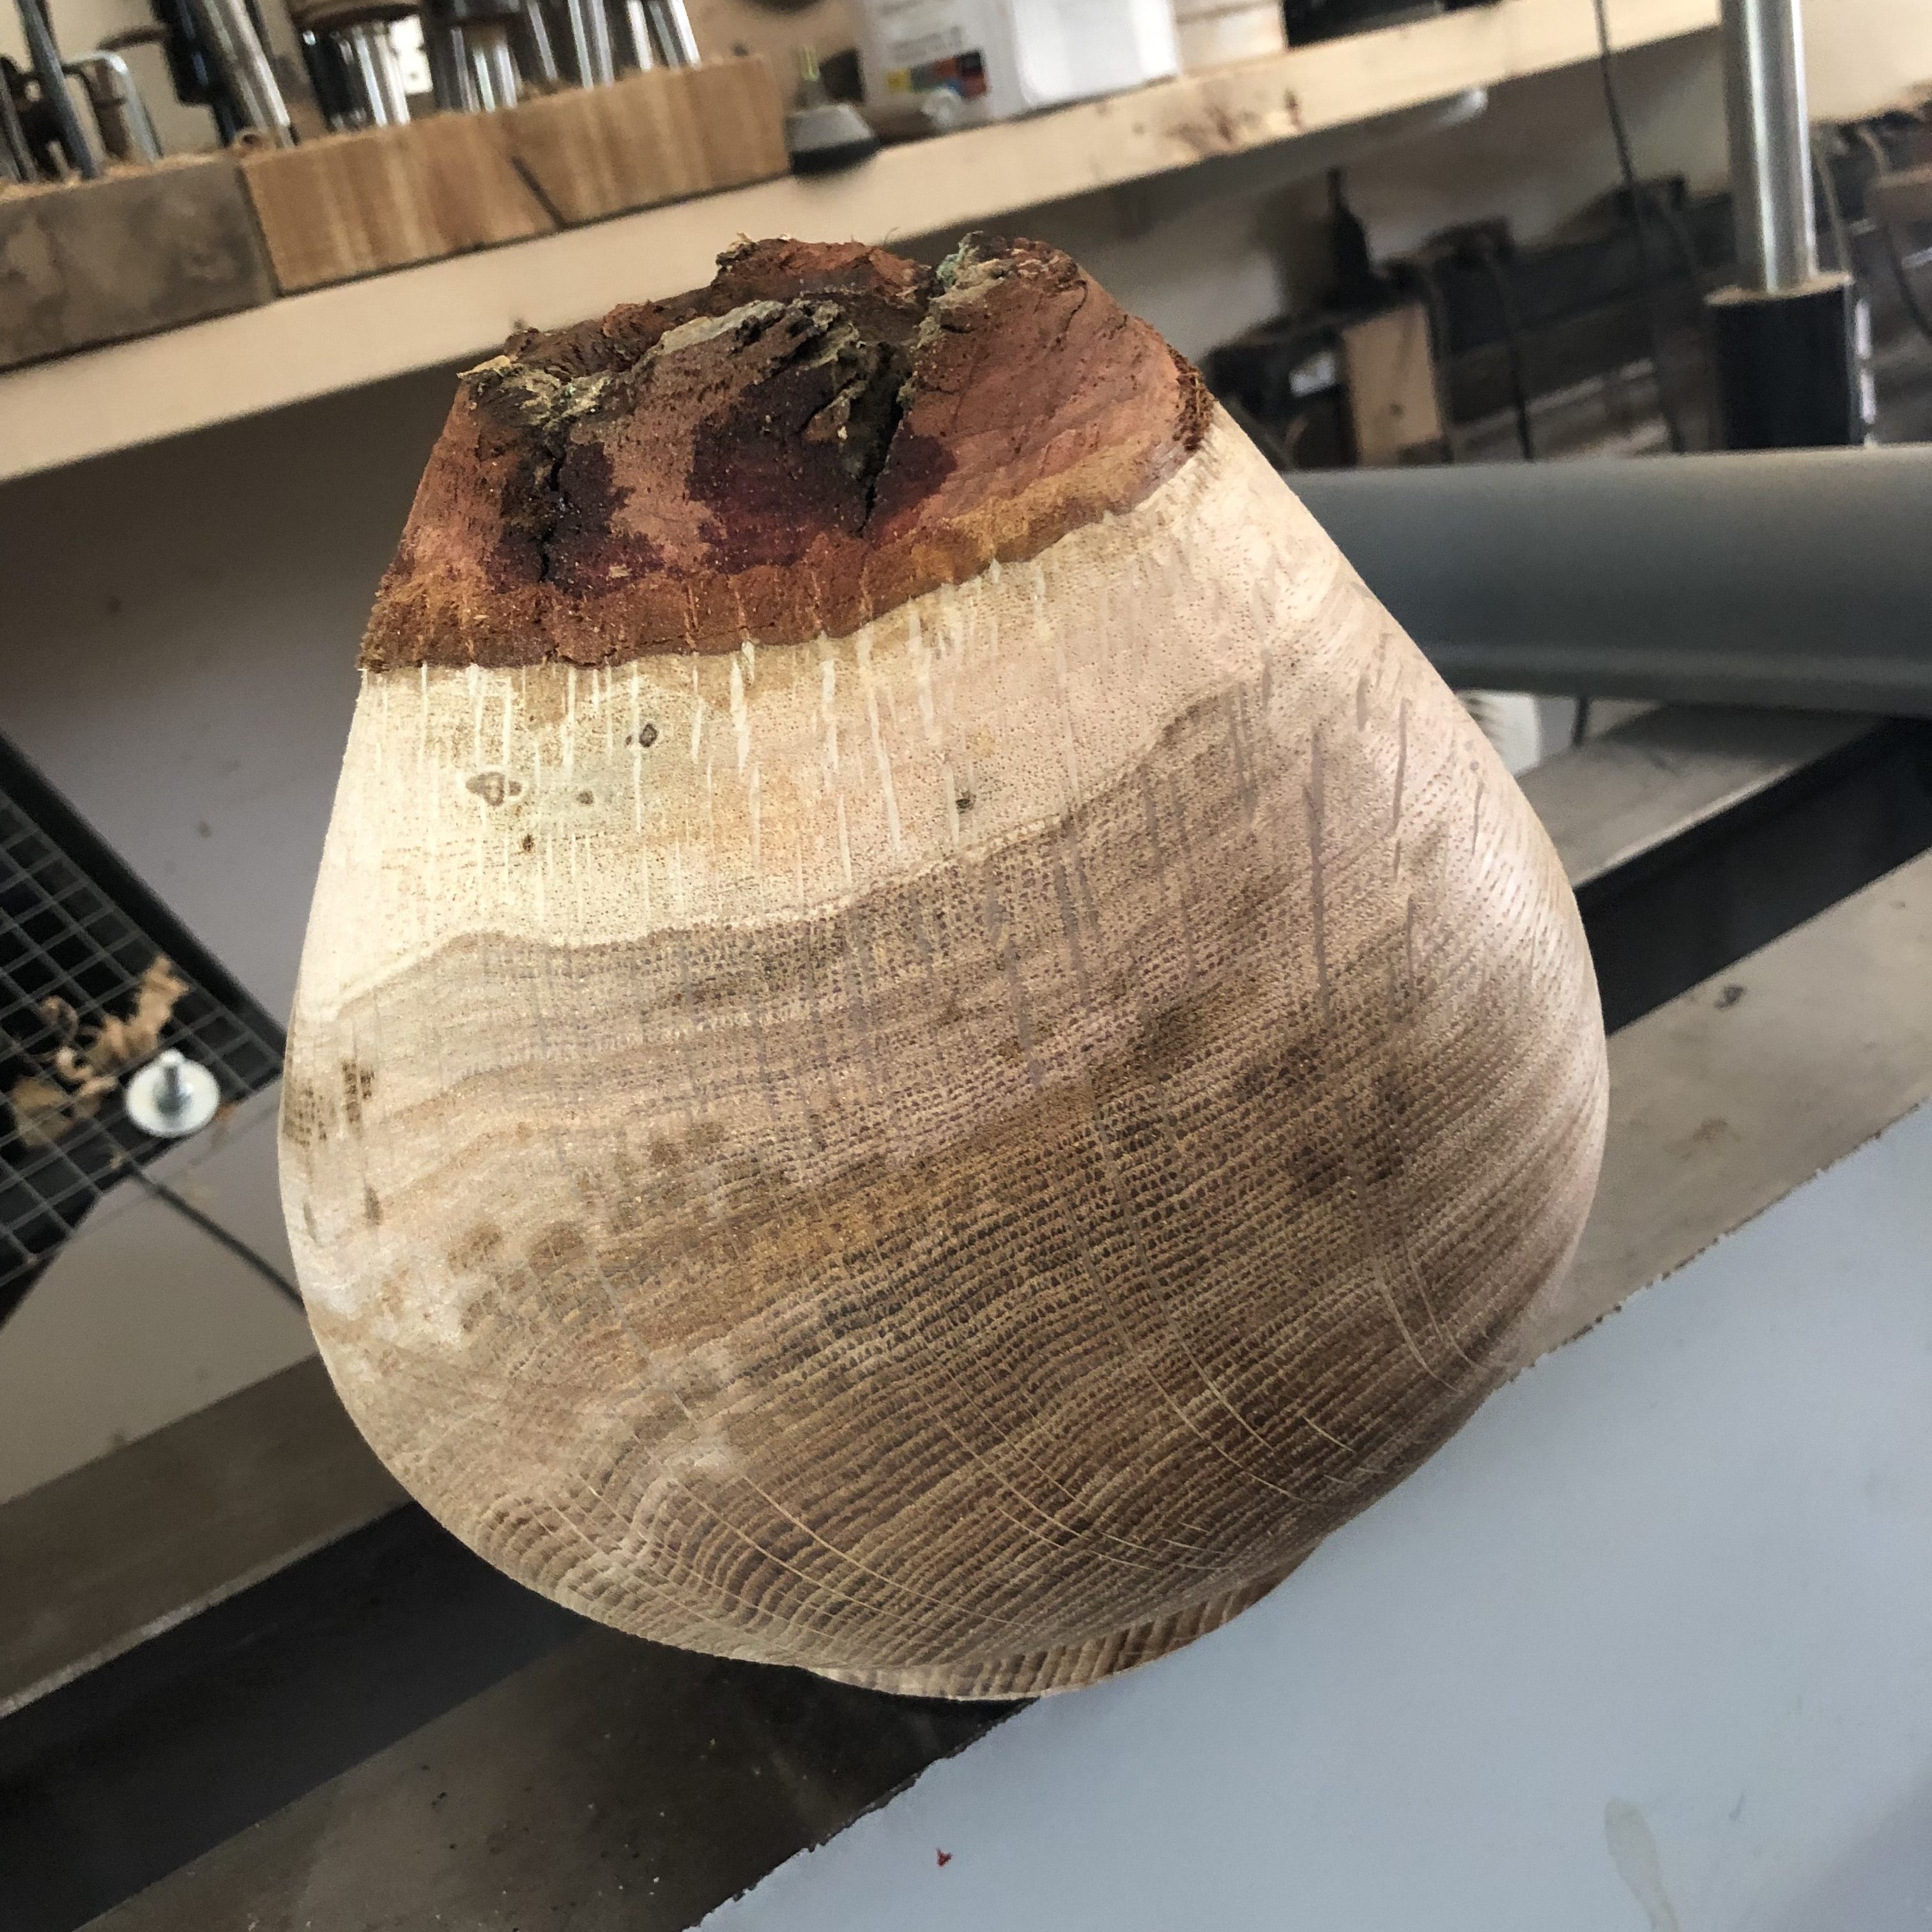
The piece should be mounted in the chuck jaws and supported by the tail-stock. With a bowl gouge (1/2″ ideally so it has some meat!) rough turn the exterior to an approximate shape for the final piece. This will be refined when dry. Depending on the wood species you may well have streamers of wet peeling come off the piece as you turn it or even sap as liquid spraying you! When this step is complete, you now need to hollow the vessel aiming to leave it with around 1″ walls. Again this allows us room to refine the shape when dry and remove any distortions to bring it back into the round.

Hollowing

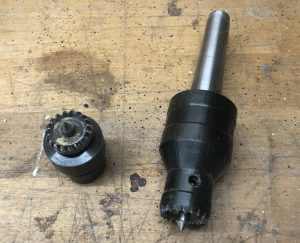
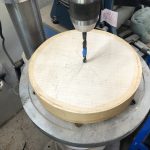
There are many ways to hollow, but my preferred method is to drill a depth hole in the centre of the vessel to the required depth. This both gives us a starting point for the hollowing cuts but also gives you a depth marker so you know when you have bottomed out the vessel to the required depth. I prefer to use a Forstner bit of around 40mm often with an extension bar to reach the required depth. Some of the systems you might consider to aid hollowing are:

  • Hope Easy Arm Hollowing Jig – link
  • Hope 6 mm Mini Carbide Box Set – link
  • Robert Sorby Hollowing Tools – link
  • Crown Revolution Hollowing tool – link
  • Woodcut Hollowing Tools – link

These systems all make the process easier. Make no mistake, hollowing is a more advanced technique and not only because you can’t see the cutter while cutting! If you can, try before you buy. No option is cheap, and you will find what suits one turner, doesn’t another. Some of the systems provide extra aids like laser or camera systems to aid you knowing where the cutter is internally and allow you to manage wall thickness without recourse to constant caliper checks. Most of the systems offer a variety of cutters, some designed for the swift removal of wood, others of a scraper nature to enable smoothing of the interior wall. Constant removal of the chips and streamers from the hollow with an improvised rake or an airline to prevent clogging.

Rough Turned Oak Vessel

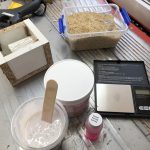
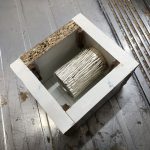
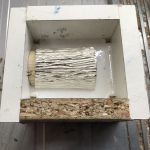
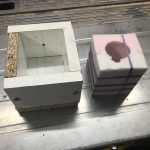
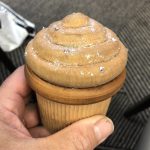
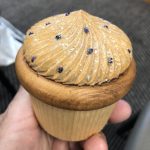
Packing the piece for drying

When the rough turning is complete, place the vessel in a box or paper bag and surround and pack loosely with the wet shavings. Seal it and weigh it, recording the weight on the exterior. Put in a cool dry place and forget about it for a few months. You want it to dry slowly to minimize cracks and distortions. An inch thick vessel could take up to a year to dry, so patience is needed. Weigh the carton/bag periodically recording the value on the container. When the value stops reducing, you have reached an equilibrium point. Time for the final stage of turning and the creation of your finished piece!

Cleaning Up

After a session of green wood turning it is essential you clean off the lather bed and your tools. The sap can be sticky, acidic or just wet! None of which is good for steel and cast iron. After cleaning off, treat your tools to a protective coating of wax, mineral oil or commercial protective spray e.g. WD40, Axcaliber Dry Lubricant.

Look out for Part 2 when we complete the turned vessel.

Posted on Leave a comment

New Work in Progress…

image_pdfimage_print

Introduction – New Work…

The aim of this rolling post will be to show pieces in preparation/production before they become available in the shop. I have a number of pieces in progress at any one time for varying reasons. That final bit of inspiration is eluding me to get the finish or effect I envisaged at the outset of the piece. Some pieces need to be made in stages, allowing some processes to cure or dry before the next step towards completion. Make a comment, offer advice or insight to maybe influence what I do next!

Just completed – awaiting pricing…

This firey piece of lightly spalted Horse Chestnut has been stained and sanded back multiple times to give a layered depth to the colours in this 14" bowl. Finished in lacquer and burnished to a lovely shine, it really glows in some lights showing off chatoyance in the timber.
This 12″ English Beech bowl has a verdigris enhanced, textured and domed rim, framed with a black border line. Again created over several days, the copper base is applied and dried, then re-applied and treated with an oxidiser. After a time the whole is protected and locked with a satin lacquer to protect the delicate patina. The central bowl is burnished to a high gloss to contrast with the rim.
A modern style chunky English Ash bowl with an evenly grooved exterior, highlighted in gloss white. The bowl is approximately 12" diameter and 3" deep with fabulous internal grain highlighted by the gloss finish.
An australian Malee burr turned to enhance the natural grain whilst retaining the extraordinary external burr natural texture.
Brown Oak Burr with a dark green resin inlay. The bowl has the classic ovolo section.
Posted on Leave a comment

Casting Alumilite – What you really need to know…

image_pdfimage_print

Introduction to Resin Casting

Having read many articles about casting resins like Alumilite and watched numerous YouTube videos I was still surprised by my first casting. The first item I thought I would encase was a pine cone! It had no moisture content and appeared fully expanded or open, however as the heat generated by the epoxy reaction increased, the cone scales started to further pop, introducing voids. In my efforts to control the mould contents, the Pot Life time approached, indicated by significant stiffening of the resin mix, meaning the resin was unable to flow and fill the new voids, even under pressure. Valuable lessons were learnt from this experience which I aim to pass on in this article.

Preparation is Key

Organise your workspace before you start to mix. Make sure all the equipment you need is laid out and readily accessible. This should include:

  • The resin of your choice. Typically both parts A&B have been opened, foil seals removed and pouring spouts clipped open.
  • Dyes of your choice.
  • Mica powders available in a rainbow of colours.
  • Mixing cups – smooth sided clear drinking plastic cups are ideal. Large and small are used depending upon the project. They are used once only and then binned.
  • Wooden tongue depressors make great stirrers available cheaply on eBay. They are stiff enough to not snap or flex when mixing.
  • Latex/Nitrile style gloves to protect your hands
  • Pressure Pot, connected compressor and mould carrier
  • Moulds to suit the project
  • Scales – ideally with a range covering fractional grams and a tare reset function.
  • Graduated container (and dry rice!)

Resin Types

The terminology around epoxy resins is a little confusing. The epoxies fall into two main types Polyester and Polyurethane. For turning purposes, polyurethane epoxies are generally the preferred option. They are considered to turn better with less chip out forming streamers of waste. Some 3D artists seem to prefer polyester types for straight casting often including fillers and pigments. It should be noted the pigments are not interchangeable. By far the most well-known brand of a polyurethane resin is Alumilite, who also supply a matching range of pigments. In the UK the most cost-effective and comprehensive supplier is Metal-Clay. In addition to pigments, Mica particles can also be used to add some amazing effects to the finished resin. Alumilite produces a range of resins some clear, some white, the clear variety are most favoured. Within that, there are two main types, similarly named so be careful what you order!

Alumilite Resin Comparison Table
Alumilite Resin Comparison Table – table courtesy Metal Clay Ltd

How much resin?

So your mould is an awkward shape or is made up of compartments making it difficult to calculate the volume mathematically. What do you do? The simplest way I have found is to use dry rice grains! Fill your mould to the required level with dry rice, then decant into a measuring beaker. This will give you a fairly accurate idea of how much resin you need to mix. This is easy with ‘mix by volume’ resins, you just split the required volume in two, in proportion to the manufacturers recommended mixing ratio. Those resins that you mix by weight, will have a conversion specified on the packaging indicating a weight to volume formula. This will require a little more math to arrive at your required parts A&B weights.

Moulds – containing the resin

Moulds for resin casting generally come in two main groups of materials. Silicone rubber and plastic (HDPE, etc). The silicone type and their manufacture details can be found in this article: Moulding the mould… The plastic variety can be formed from a range of commonly available plastics. Nylon chopping boards from the supermarket are cheap and readily cut to shape. This can be combined with plumbing and electrical pipes to yield a range of moulds for different purposes. Sometimes, a mould release spray isn’t even needed, before adding the resin. A sharp tap on the cured resin can be enough to extract the casting.

Mixing and Styling

Time is your enemy! As you can see from the Pot Life column in the table above, you don’t have long once parts A & B are combined. Some casters add their dyes and mica colourings to part A and then mix, but this can make it difficult to see the strands of unmixed parts of A & B, so some prefer to mix A & B, then add their colourings. Either way, with Alumilite Clear you have only 7 minutes! Don’t panic though, with good organisation and everything laid out on your workbench, 7 minutes is plenty long enough. Stepping back, once you have chosen your resin, read the instructions and check how the proportions are calculated. Alumilite is 50:50, but note that one type this is by weight and the other volume! Other manufacturers products can have entirely different ratios, so read the instructions carefully! Next, when you have combined the parts A & B, they need to be mixed thoroughly, so you have a uniform colour to the combined mixture with no streaks or strands running through the mixture. The mixing should include the corners and scraped sides of the beakers so there are no unmixed resin constituents. The mixing should be firm, but not so vigorous as to incorporate excessive air.

Separate your mixture into separate beakers if you are doing a multi-colour pour. Add dye and/or mica powder to the beakers, and again mix in thoroughly. You can let your creativity run wild here. Dyes and mica’s can be mixed together in any combination. You can also add other effects like iridescent, phosphorescent and pearlescent powders for that unique look.

As stated previously, heat is generated by this chemical reaction. Using an infrared thermometer, monitor the temperature. Most casters find when 30 degrees centigrade is reached, this is the optimum time to combine the different coloured mixes in your mould, so they combine, but retain their individuality and don’t just turn into one homogeneous colour!

Pressure Pot or not?

Although only Alumilite Clear needs pressure when curing, as I now have a pressure pot, I tend to put everything in it. The idea is that the 50 lb psi pressure crushes any air bubble to be so small they are invisible in the set resin. With Alumilite Clear curing so much faster than Alumilite Amazing Clear, there isn’t time to wait for air bubbles to rise to the surface and be pricked or even burst with a naked flame! Typically I leave my curing resin in the pot overnight. Usually, I see minimal pressure drop overnight with my setup, 10lb drop max, with which I can live.

Purpose made pressure pots can be expensive, but eBay can provide a source of pressure paint pots which can be easily converted and have a suitable safe working pressure. It just requires removal of the internal paint suction spout, capping this off externally. Then add two isolation valves and tail for attaching a pressure feed from your compressor to the existing tee. All joints should be well sealed with PTFE tape (6 turns) or paste/liquid. With the attached gauge and built-in pressure relief valve I have set mine to allow 50lb psi max pressure.

Vacuum chamber and caddy

The internal base of the pot is dished, so making a simple wooden carrier makes life simpler lowering and retrieving moulds. If interest is shown in my setup, I’ll write up a more in-depth article and sources of components in a future article.

De-Moulding

After approximately 12 hours your resin will be easily hard enough to de-mould, but you should wait longer before turning it, perhaps 48hrs. Some silicone moulds give up their cast blanks easily, some plastic moulds need a sharp rap and the resin pops out, some can be a complete pain! The screwed together HDPE types seem to need a side or two removed, so the blank can be levered out. The pipe moulds sometimes release easily, sometimes I have to slit them up the tube side! Use of a commercial mould release definitely helps but isn’t a guarantee in my experience.

Conclusion

However careful you are mixing your resin volumes, you will likely be left with some dregs in your beaker. Keep a separate dregs beaker and tip your waste from each pour in it. Over time you will build a solid striped pot of resin you can use to turn a colourful, if random, bottle stopper!


Posted on Leave a comment

The Science Behind the Art…

image_pdfimage_print

Introduction – the basic science of cutting wood!

In this article, I’ll cover some of the science fundamentals of turning wood because this affects the why and how of the interaction with the timber we turn, whether cutting, sanding or applying stains and finishes.

Timber – the biology

Any piece of wood is made up of fibres, which are actually minute tubes usually arranged in a bundle, running lengthwise up and down trunks and branches. Let’s illustrate that with a bundle of straws and chopsticks!

Vascular bundle of a branch illustrated by a bundle of chopsticks and straws

I am not going to discuss the biology in this article ( that can be found here), more the effects we need to be aware of, so we can use them to our advantage, or avoid them causing issues as we create our masterpiece! For now, think of the chopsticks as structural strands in the bundle, and the straws as tubes, that move nutrients through the wood. The important point is the bundle strands are all orientated in one direction. The exception to this arrangement is burr or burl wood where the fibres are random and have no uniform direction. This both gives this type of timber its beauty but also makes it harder to turn.

Spindle Turning

In spindle turning the piece of wood has its fibres aligned with the lathe bed and is usually turned between centres. Traditionally a 2 or 4 prong drive centre is used at the head-stock and a cone centre in the tail-stock. The tool approaches the spindle and is run along its length on the tool-rest effectively planing shavings off the spindle as the tool traverses the spindle. The tools can be spindle gouges or a skew chisel. The skew, in skilled hands, can produce a near perfect finish off the tool, including beads and coves.

These days, many turners prefer alternative centres which don’t penetrate the straw bundle of fibres, as they are designed to spread the load across more fibres ends. These centres include the ring centre and the steb centre.

Bowl Turning

In bowl turning the piece of wood is effectively held at right angles to the lathe bed, meaning the fibres rotate in opposition to the lathe bed. The means for two quarter turns the fibres are aligned with the tool cutting edge and “plane”, and two quarters the end grain is offered so the cut is across the bundle of tubes. For this reason, there can be greater forces involved. so the wood is held firmly to a face-plate or in a chuck. The bowl gouge is also more substantial in construction and generally longer so the turner has more leverage to control the tool.

Rubbing the bevel

The phrase “Rubbing the bevel” is common parlance with woodturners for good reason. The concept is the smoothly polished steel shoulder behind the cutting edge rubs against the timber and doesn’t cut until the handle is lifted very slightly until the front edge starts to cut. The same is true of gouges and skews, but the technique is different.

Sanding

Sanding usually involves working through the grit range, typically 80 > 120 > 180 > 240 > 320 > 400 and sometimes on to 600 > 800. Again remember the fibre tube orientation, the advice in traditional woodworking is to sand with the grain, that is, along with the tubes. That is harder in wood-turning. With spindles, some sanding with the grain can help remove marks or raised grain. With bowls, you have end and cross grain presented to the grit alternately as the bowl turns. The raised grain is usually the end grain showing itself as you sand. Some lathe’s offer a reversing facility, thus allowing you to sand the tubes from two directions which can aid getting a smoother finish, by severing the raised fibre ends.

As you get to the end of your sanding regime, a sanding sealer is often applied which can be shellac based and may also contain solids (often talc!). The idea is to bind surface fibres and fill minute holes, that is, the tube ends of the vascular bundle from the end grain.

Staining and Colouring

With staining and colouring regardless of whether spirit (Chestnut) or water-based (Intrinsic Colours) products are being used, the tubes come in to play again. In this case, they can act like straws, the colour being drawn up the tube which can give the effect of deeper shades on end grain than on the side. Most turners tend to colour, then seal, as colouring can again raise the end grain and require cutting back with a non-aggressive product like NyWeb pads. With thin walled vessels or woods with a coarse grain, be aware that colour can bleed through the vessel wall! In some situations this is not what you want, however, some turners work with burr/burl, colour from the inside of the vessel so the random nature of the grain orientation causes variable bleed through the wall sometimes resulting in attractive patterns being formed on the visible outside of the vessel.

Finishing

Lastly the finish! I’ll address finishes in another article in more depth, but for now, getting the preparation right up to this point, pays huge dividends in the final finish, whether oil, lacquer or wax. Having a smooth, even, dust free, sealed surface forms the perfect foundation for your final layer of finish, which will really make your piece pop! Don’t rush these final stages, expect to take as long finishing as using the turning tools!

Conclusion

Understanding the structure of the timber affects every process you undertake in creating your end product, whether mounting, cutting or finishing. Grasping these fundamentals will help you understand why we undertake these processes in a particular way, and how you can adapt them to accommodate your own creative ideas successfully.

Posted on Leave a comment

Moulding the mould…

image_pdfimage_print

Introduction – Making your first mould…

For casting resin you need a mould! Sounds obvious? But for some of the things wood-turners make in particular, off the shelf moulds don’t exist or you need a bespoke mould or even a mould you can use over and over. Examples would be casting resin pen blanks or cabochons for letting into turned boxes as features.

Moulds for resin are generally made of silicone rubber. This material comes in many forms as a two-part liquid, which you combine to start a chemical reaction which sets the silicone. The final silicone rubber can have different properties, which depend on the use you’re planning. There are high-temperature silicone’s which you can even use with hot molten pewter! Two other factors to consider are mould re-use and mould flexibility. If you plan to keep re-using the mould for repeated pen blank production, look for a silicone that specifically says it is designed for multiple uses, otherwise it is likely the mould will tear after a few uses. The last feature we’ll discuss here is the flexibility. In terms of measuring flexibility or hardness, a Shore scale is used which is defined here. Really soft rubbers need a backing to aid their rigidity. We need something firm enough to keep its shape and support the resin, but flexible enough to allow de-moulding. Something around Shore A30 is a reasonable balance.

Moulding or Containing the liquid silicone

For simple moulds, you can recycle most plastic boxes or tubs. For more bespoke moulds you need to make a box, perhaps with forma’s to shape the setting silicone. The surface of the box needs to be smooth, so the silicone doesn’t readily stick, even without a mould release agent. I use cheap melamine shelving board, as it cuts easily and can be screwed together. The joints I seal with budget silicone bathroom sealant from a push tube or a hot melt glue gun. When your mould is finished, you need to make sure there are no leakage points! The mixed silicone may appear viscous, but it has a way of finding any gap and seeping out!

Two-Part Moulds

On rare occasions, I’ve had a need to cast in resin an uneven shape, perhaps something vaguely cylindrical. In this scenario, you need to cast the mould in two parts, usually roughly equal in size and split along a plane that can hide the join. Typically you cast one half, let it cure, while establishing some register points to aid locating the two halves together accurately. When the first half is cured, treat this half’s mating surface with either a specific rubber to rubber mould release or even Vaseline, which I have found works well. Then pour in the second batch of silicone and leave to cure.

Mixing, de-gassing and pouring

Finally, we get to mix our silicone and catalyst causing the rubber to cure. There are many products available, some will require degassing after mixing, some are designed to expel the air or at least not let it affect the finished surfaces of the cured mould. Some silicone’s are mixed by weight, some by volume, just follow the instructions. Make sure you have taken note of the cure time for the silicone you have, this can vary from minutes to hours. You must get the mix into the mould while it is still fluid and not becoming viscous. Make sure the two parts are thoroughly mixed, some silicone’s come in two colours to make it easier to see the combined even colour, some are clear additives which become invisible when added to the main component. Two tips. Make sure you use your stirrer to get into the corners of your mixing container and really scrape the sides into the mix. Next, mix steadily and evenly, try to incorporate as little air as possible, unlike beating eggs!

If your chosen silicone requires degassing, put the mixed silicone in the vacuum chamber and slowly apply vacuum. You will be surprised how much the volume expands as the air is drawn out, so manage the air flow so the mixer container in the chamber doesn’t overflow!

Vacuum chamber and caddy
Homemade vacuum chamber and caddy

Now your mix is ready for the mould, you need to pour it in slowly in one place, allowing the silicone to flow over the mould, hopefully not trapping any air. Moving the pour around can cause bubbles to be caught in the silicone liquid which needs to be avoided. Some makers recommend pouting the liquid silicone from a slight height rather than next to the mould top, so a fine stream of liquid is gradually added to the mould, their belief is this surprisingly doesn’t trap air.

Finally, the mould can be tapped, jiggled or even put on a gently vibrating surface to encourage any air bubbles to the surface. Any bubbles that don’t pop, but are visible under the surface, can be popped with a cocktail stick. Some dense silicone’s may suggest a second degassing, placing the mould in the vacuum chamber, but with the choice of products available, I would avoid this option.

Conclusion

The moulds for this step, don’t need to be pretty, but functional. Nevertheless, I like to make them reasonably true so the silicone mould produced is itself evenly shaped, so casting the resin in the silicone mould is also trouble-free. Well, at least from mould issues, casting itself has a whole lot of other considerations. We will look at those in another article…

Posted on Leave a comment

Mounting the Blank – Starting Your Bowl

image_pdfimage_print

Introduction – Starting your first bowl…

Mounting your bowl blank is the first step to getting started. Whether it is square or round, you need to find the centre. There are many tools available to help you be more accurate than just eyeing it up! These include:

The centre is generally first found and marked out on the top of the bowl, which will ultimately be the part hollowed out.

Marking Out the Blank

With a square blank, drawing pencil lines across opposite corners, the intersection marking the centre, is the easiest option. If you’re making a square bowl you’re done, if you’re making a round bowl, remove the blanks corners by bandsaw or hand. If you are finding the centre of a roughly circular blank, centre finders work by enabling you to draw multiple lines from the edges to intersect in the centre. This helps you pinpoint the best centre point. The centre point should be marked with a bradawl or centre punch to form a depression the drill can be started in. Lastly, we have the perspex circle layout template. This is particularly useful when working with uneven natural edge blanks, enabling you to find the optimum centre visually, as the actual centre may not be the best aesthetically for your envisaged design.

Drilling the Pilot Hole

The drill size needs to be equivalent to the core diameter of your worm-screw excluding the thread depth, typically around 8mm. You must only drill the hole deep enough to allow the worm-screw to bite and the blank threaded home to sit snuggly and evenly against all the chuck jaws. Many turners keep a drill just for this process and wrap a piece of electrical tape around the drill to mark the maximum depth. If you have a smaller, shallower blank, you don’t have to use the whole depth of the worm-screw. A spacer can be added made of ply or plastic which sits bewteen the chuck jaws and the blank allowing only three or four threads to penetrate the blank. This perfectly secure for smaller blanks.

The hole needs to be drilled as perpendicular to the blank as possible. I prefer a drill press, but some turners use a battery drill being careful to hold it vertical. The blank can now be threaded onto the worm-screw. The blank should be offered up and screwed on carefully, applying even pressure. The aim is to get the blank screwed fully home touching all the jaws, but not over tightened to the point of possibly stripping the thread in the blank! Spin the blank by hand to check it is running fairly true, don’t worry about slight wobbles, no blank is completely true.

Conclusion

Next, we will look at roughing out the back of your bowl and getting it true.

Posted on Leave a comment

Holding your work in a chuck! Are You an Innie or an Outie?

image_pdfimage_print

Introduction – Getting a Grip!

This article is a consideration of how best to hold your bowl blank in your chuck. You will find different wood turners all have different views on this topic. Personally, I think there is a place for both techniques. The inner technique requires a slight recess in the base of your bowl blank, perhaps 3mm deep, of a diameter slightly more than your chucks jaws when nearly closed, with a dovetail edge to the rim of the recess. The outer method is the reverse, a spigot is formed perhaps protruding 3mm, also with a dovetail edge, and of a diameter to fit inside the jaws when nearly closed and forming a near perfect circle. Each method has advantages and disadvantages, part of your evolving skill is picking the best method for your turning plan.

The Jaws

So. let’s unpick the stages to this decision to help inform your choice. I have three sizes of these jaws often referred to as Type C. They have a slightly dovetailed cross section on both the inner and outer rims. The standard size is 50mm often supplied as standard jaws with a new chuck. I also have 35mm ones which I use for smaller boxes and on rare occasions, I have to reform a spigot on a piece where the 50mm dovetail has become malformed. The 100mm can be used for larger work, but I use them primarily for the initial rough turning of green wood vase/urn blanks. As the blank dries, the spigot can distort, perhaps becoming more oval, so the blank has to be re-chucked between centres so the distorted 100mm spigot can be remodeled as 50mm, so I can re-hold the piece in the standard jaws. Woodturning is often about planning a job ahead of time and allowing for “design opportunities” as wood turners euphemistically refer to things not going as originally planned!

The Chuck

There is a range of chucks on the market that comes with what is often referred to as Type C jaws as standard at the time of writing, including the Nova G3 or SupaNova, Robert Sorby Patriot and Record SC4. I have a Patriot and an SC4. There is very little to choose between them.

The chuck jaws are manufactured as a disc, then sliced into accurate quarters normally using a 2mm slitting saw. This means a perfect circle is formed by the jaws when there is a 2mm gap between the quadrants. The woodturners aim, when creating a spigot, is to make it as near to the jaws perfect circle dimension as possible, which in turn means as much of the jaw rim is in physical contact with the spigot as possible. This ensures the strongest grip on the spigot, supports the spigot and gives an even grip around the spigot. The reverse is true for a recess. When the jaws are expanded into the dovetailed recess they should also form a near perfect circle.

The Dovetail

The base of the bowl should firstly be trimmed to a flat even surface. Then, the dovetail should be carefully cut to the correct depth, often with a part-tool, then trimmed up to a dovetail section to match the dovetail angle, on your chuck jaws. Many people prefer to use a small skew chisel as a scraper for this finishing cut. It is important that the angle of the dovetail does match your jaws, again to make sure there is good even contact between the jaws and timber. You should also check that the root of the dovetail is clean and not full of dust, so the jaws sit correctly. The recess for an expansion grip should be cut similarly. Firstly, a groove is cut to allow the jaws to enter and sit snuggly against the base of the bowl. Turners often remove all the wood from the recess at this stage. Again, the correct dovetail is formed on the outer edge of the recess, allowing the jaws to expand snuggly into place.

The Grip

Following the steps previously described above should give you a strong dovetail for the jaws to grip. Most woodturners feel the compression effect of gripping the spigot is the strongest method, although if you experience a major catch, your work can either be ripped from the jaws or the spigot can become severed! The expansion method in a recess is strong while the bowl blank is unrefined, but as soon as you start forming the foot of a bowl, the ring of timber then formed has the potential to split with the wedge-like chisel pressure the jaws are applying. The turner just needs to be aware of the issues and adjust their cuts appropriately. One other factor to bear in mind is the wood density, which can affect how much the wood can be compressed under the mechanical pressure of the steel jaws. Soft timbers like Lime can be deformed very easily, whereas Oak less so. Consideration should also be given to timbers that split with the grain easily, like Ash. This timber is often used for shingles and similar purposes because it can be readily split, but this can work against us in an expansion chuck grip scenario. Do not let this put you off, just balance the factors in your planning after all Ash is a fabulous timber offering many possibilities in creative turning.

Finishing Up

Your piece is now finished, what’s next? If you used a recess, there’s nothing more to do. If you used a spigot, you now need to remove it. In-depth information can be found in my article Bowl Bottoms! For now, the stub can be removed by reverse chucking the bowl using a friction faceplate supported by the tailstock, cole jaws, Longworth or vacuum chuck. The stub is gently turned away with light cuts, leaving a slightly concave base. Your maker’s mark and any decoration should be applied before final finishing to match the rest of the piece.

Conclusion

So, Innie or Outie? The recess method is quicker and leaves a re-chucking point in the base of the bowl. Some decoration in the recess can re-enforce the idea this is a feature of the bowl, leaving a rim like on a ceramic plate. Apart from aesthetics, the major downside is the strength when the recess is part of the foot.

The stub method requires more work at the end of the job to remove it and means it is very difficult to re-chuck should that be needed. For purists, exhibitions, and competitions, no visible chucking point and a properly finished smooth bottom are essential features. In the end, it is your choice.

Posted on Leave a comment

UKIWS 2018 Symposium Report

image_pdfimage_print

UKIWS 2018 Logo

UKIWS 2018 – A woodturning Family Party – Day One

Morning everyone. Welcome to UKIWS 2018 on a sunny Saturday here at the Coventry Hilton Doubletree Hotel. Despite a crazy 5 1/2 hour journey up from Sussex last night, a warm welcome was awaiting, characteristic of this event, now in its third year, bigger and better no doubt! Great to meet old faces Martin Saban-Smith http://www.msabansmith.com, Ed Oliver https://www.oliverswoodturning.co.uk/ as well as new faces to me, Wayne Clasper (Wayne the Woodturner) and Jim Overton (Jimson’s Stuff). Great conversations with all of them, sharing tips, disasters and experiences over a drink or two!

Off to the opening and see what goodies await in the trade area, then on to the first Master Class by Les Thorne, demonstrating the turning, colouring and texturing of one of his striking and tactile box designs.

Day One Review

Started the day with a quick stroll around the trade exhibition stands eyeing up possible purchases for later! Really good to see an expanded range of trade exhibitors including Nova, House of Resin and others. Took the opportunity to purchase a few blanks for later creations which are not easily available in Sussex, but it was also good to handle the pieces, choosing particular blanks for future projects and learning about their provenance.

Les Thorne - Textured Box UKIWS2018The first demonstration of the day was Les Thorne (http://www.noturningback.co.uk/), which turned out to be enjoyable, educational and humorous. Les, a professional jobbing turner, has a wealth of experience and imparted knowledgeable tips for beginners and seasoned turners alike. His chosen demo item was a textured and coloured box. He took us through the use of his favourite tools, economy of movement, protecting your cutting edges and numerous other comments and quips along the way. The charming little box was textured with an Arbortech two toothed grinder and airbrushed, building up to a nice finished piece. Les paid particular attention to getting the right fit for the lid to the base, covering tight, pop, loose and his favourite, a gravity fit where the lid slowly slides into place when finger released. I think all attendees will be aspiring to try this when we return to our workshops!

The second demo, was Jeff Hornung (http://www.thewalnutlog.com/) from the Walnut Log, USA starting his demo with his signature piece a blue textured bowl. Nothing ground breaking here, but the way Jeff combined and used common techniques, was the key to his striking piece. He coped ably and good humouredly with jet lag, strange tools, lathe and timber! His second piece using feather shaped stencils, airbrushed sunsets and silhouettes giving all attendees ideas for our own future creative ideas.


Returning to the main room, Emma Cook, the Tiny Turner, was in full flow to a packed seating area creating a turned and carved pumpkin box. I look forward to her Masterclass on her signature Muffin box.

Great to circulate the hall and chat with many YouTubers including Gary Lowe, Simon Hope, Paul Howard, William Hunt, Jon Clothier, Stewart Furini to name but a few. All gave freely of their time and knowledge but were maybe a bit bemused when anonymous strangers walked up to them offering their thanks for their efforts. The day moved into the evening social where stories were shared and compared long into the night for some!

Day Two

Today, I’m attending two Masterclasses, firstly Emma Cook, alias the Tiny Turner (https://www.thetinyturner.co.uk/), and she really is petite in real life then David Lowe demoing his balance bowl, defying the laws of physics!

Day Two Review

Another fabulous day! Started the day with a class led by Emma Cook demonstrating the techniques involved in creating one of her famous cupcakes. She works in Lime, a favorite timber for woodcarvers, but a bit soft for woodturners, nevertheless she enthusiastically explained how to work with the wood and get the best finish off the tool with minimal sanding. Having created top and bottom of the cupcake box, Emma moved on to teach us how to carve, sharpen carving chisels and a simple understandable explanation of these foreign tools to her woodturning audience. Everything was delivered with great northern patter and humour. A privilege to attend this session, I would heartily recommend Emma if you get the chance to hear her on the club circuit.


After a hasty lunch, David Lowe delivered his masterclass session on a suspended bowl and a canteen. David explained carefully the making of each piece, demonstrating techniques many in the audience realised they could transfer to their own projects. David fought various “design change opportunities” along the way with his canteen made of multiple pieces, but this demonstrated to us all how we can adapt as our creation evolves!


4.00pm saw the symposium draw to a close. Another successful year and an event I can heartily recommend to all fellow woodturners. There is something for everyone at all stages of their woodturning journey. See you next year!